:format(webp))
Mastering CSS Specificity: From Core Rules to Advanced Techniques
When you finish this guide, you’ll know how browsers choose which CSS rule to apply, how to calculate specificity down to the digit, and how to avoid common traps. You’ll also see how frameworks, preprocessors, CSS Layers, and dev tools can affect—or simplify—your style decisions.
What Is CSS Specificity?
CSS specificity is the algorithm browsers use to pick one rule when multiple selectors target the same element. Think of it as a scorecard that ranks declarations by importance.
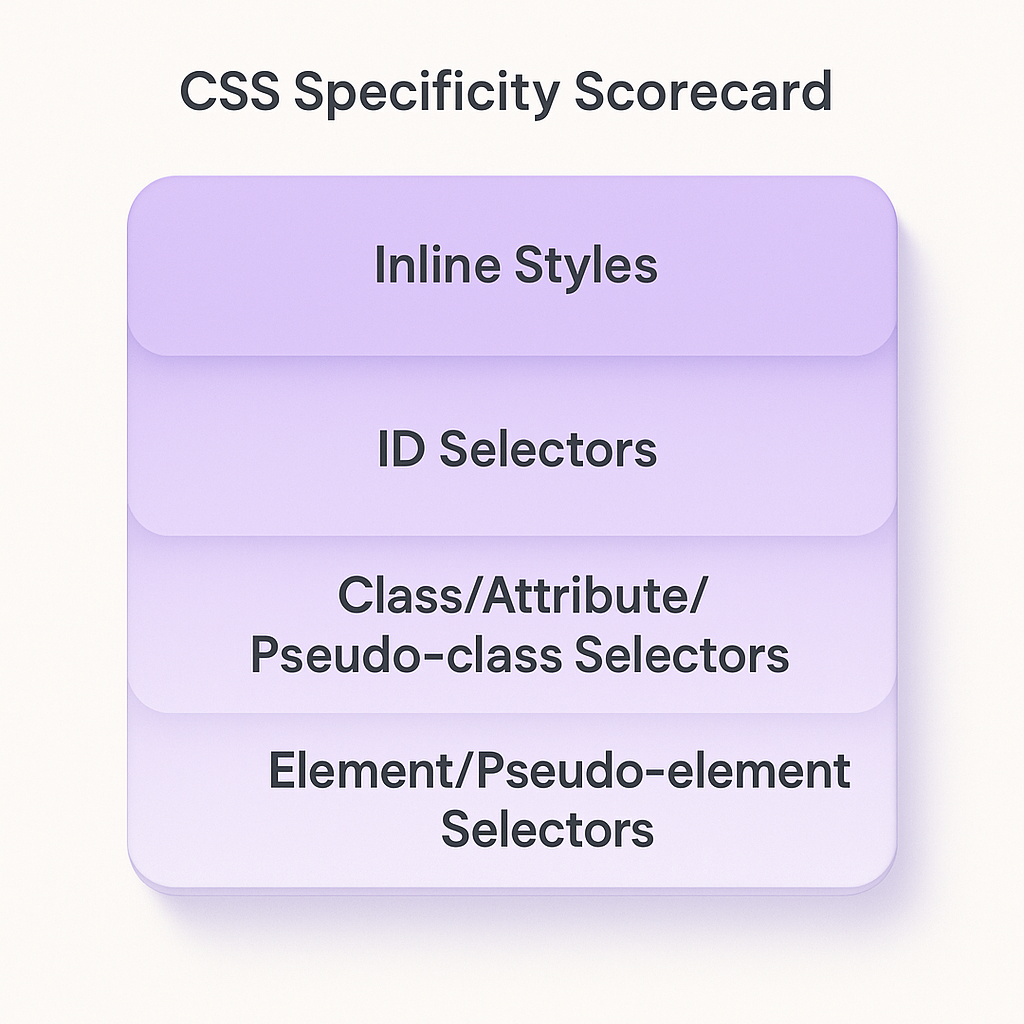
Every selector contributes to one of these buckets:
Inline styles (style attribute)
ID selectors (#nav)
Class, attribute, and pseudo-class selectors (.btn, `[type="text"]`, `:hover`)
Element and pseudo-element selectors (`div`, `::before`)
This breakdown and the exact specificity calculation are defined in the W3C specification on CSS Selectors Level 4 specificity .
How to Calculate Specificity
Specificity is often expressed as a tuple (a, b, c):
a = number of ID selectors
b = number of class, attribute, and pseudo-class selectors
c = number of type selectors and pseudo-elements
For example,
#header .nav-item:hover a::before {
  ...
}
a = 1 (id)
b = 2 (class + pseudo-class),
c = 2 (element + pseudo-element)
Specificity = (1, 2, 2)
Selector Example | a (# of ID selectors) | b (# of class/attribute/pseudo-class selectors) | c (# of type selectors/pseudo-elements) | Specificity |
|---|---|---|---|---|
#header .nav-item:hover a::before | 1 | 2 | 2 | (1,2,2) |
.container .item | 0 | 2 | 0 | (0,2,0) |
body.homepage main section | 0 | 0 | 3 | (0,0,3) |
Three special pseudo-classes tweak these rules, as detailed in the MDN guide to CSS specificity and pseudo-classes :
`:where()` has zero specificity
`:is()` adopts the specificity of its most specific argument
`:not()` also uses the specificity of its most specific argument
Pseudo-class | Specificity Behavior | Notes |
|---|---|---|
:where() | Zero specificity | Always zero regardless of arguments |
:is() | Inherits specificity of its most specific selector | Picks highest specificity among arguments |
:not() | Inherits specificity of its most specific selector | Excludes itself but counts inner selector |
When declarations tie on specificity, the one defined last in your CSS wins. Adding `!important` trumps normal rules but should be your final resort.
Avoiding Common Specificity Pitfalls
Overly specific selectors and excessive `!important` flags make your stylesheet brittle. To stay flexible:
Favor class selectors over IDs
Keep your selector chains short
Reserve `!important` for utility classes or user styles
Specificity in Component-Based Frameworks
In frameworks like React, Vue, or Angular, CSS often lives alongside components. That brings new challenges:
Scoped styles (Vue) or CSS Modules (React) automatically generate unique class names to avoid conflicts.
CSS-in-JS libraries (e.g., styled-components documentation ) inject styles at runtime, sometimes raising specificity by adding generated IDs.
Inline styles (JS style objects) outrank external styles but can’t leverage pseudo-classes or media queries.
Being aware of how your framework handles style isolation helps you predict which rules win without over-relying on overrides.
When Preprocessors Add Hidden Specificity
Tools like SASS and LESS let you nest selectors, but deep nesting multiplies specificity.
Example with SASS nesting:
.card {

  &__header {

    &--active {
      /* specificity += 2 type selectors + 1 class */
    }

  }

}
This pattern can balloon your specificity count without you noticing. To avoid that:
Limit nesting levels to two
Use mixins or `@extend` for reusable patterns
Audit compiled CSS to spot selectors with high scores ( SASS nesting documentation )
The Specificity Wars in Large Codebases
When multiple teams or features pile on more specific selectors to override others, you enter a specificity arms race. To defuse conflicts:
Introduce a naming convention (BEM, SMACSS)
Refactor high-specificity rules into utility classes
Use a global reset or leverage cascade grouping with an introduction to cascade layers
Perform regular CSS audits with tooling like Stylelint
CSS Layers and the Cascade
CSS Layers (Cascade Level 5) let you group rules and assign a layer order. Rules in higher layers override lower layers regardless of their specificity:
@layer components, utilities, base;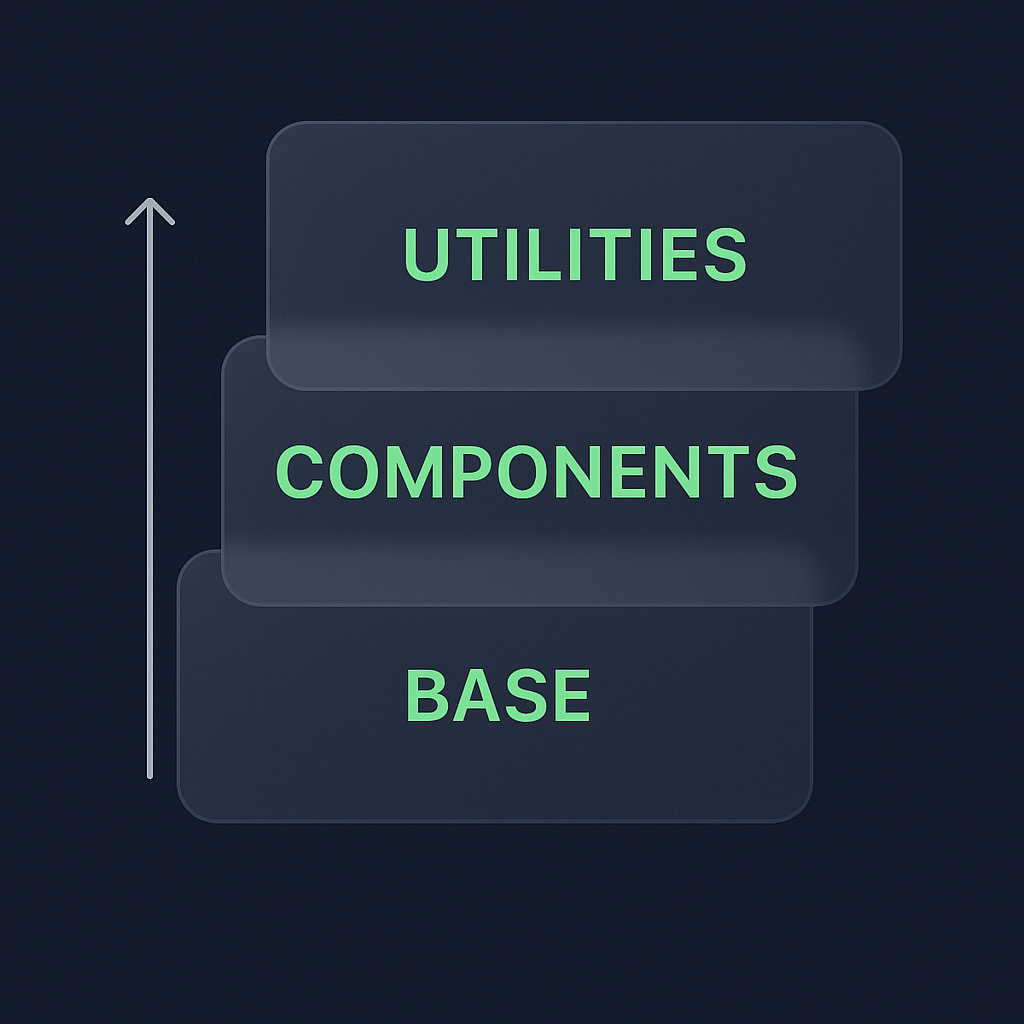
base: resets and defaults
components: your UI patterns
utilities: low-level utility classes
This ordering gives you predictable overrides without cranking specificity.
Inspecting Specificity with Browser DevTools
Modern dev tools highlight which rule wins and show its specificity score. In Chrome, open DevTools → Elements → Styles panel:
You’ll see crossed-out rules and the one being applied
Hover over selectors to display specificity numbers ( Chrome DevTools CSS debugging guide )
Firefox and Edge offer similar insights. Use these visual cues to track down why a rule isn’t applying.
Your Style Rules, Under Control
You’ve seen how specificity scores come together, why nesting and IDs can trip you up, and how modern techniques like CSS Layers or scoped frameworks can simplify matters. By writing with intention—lean selectors, clear layer order, occasional audits—you’ll spare yourself those late-night debugging sessions and keep your stylesheets easy to maintain.
:format(webp))
:format(webp))
:format(webp))